Saturday 5 September 2015

How to make a shaker card


You will need.

card stock.

Picture ( I stamped mine and coloured with Copics).

Square dies ( or what ever shape you want ).

If you don't have dies you can cut out a frame.

Transparency film (what you use for over projectors).

Micro beads.

Glue. 

3Dfoam squares. 


Start by choosing the picture you want for your shaker card. Here is my stamped picture. The stamp is from the   gorjuss selection. I have mounted it onto a background card.


Next you need to cut out a frame if you use dies then it's best to cut the largest shape first and then use the smaller size die to cut out the inner hence you make a frame like in the picture below.


 The next stage is to cut out your transparency to fit the frame. Like in the picture below. I used a thin line of glue.

Now you need to stick your 3D foam squares on to the frame making sure there are no gaps. ( if there are gaps then when you shake your card your beads will fall out). Make sure your 3D foam squares are within the frame, you might have to cut them depending on the sizes you use. See photo below.

Now here is the tricky part. I like to have my picture flat on the table. I then place a thin line of glue over the 3D foam squares. 


I then have the beads ready and as I lay the frame over the picture I place three sides gently down on the picture whilst at the same time I put in the micro beads in the top opening using a table spoon. Once all the beads are in I then close and press the entire frame to the picture.


Once the glue has dried I then make the rest of the card up. Try and think out of the box you can make any shape into a shaker card the secret is to make sure you frame is completely sealed with the 3D foam.

Good luck.


Thursday 30 April 2015

Ingrid's turn to play with paper


It's my daughters turn to play with paper. She showed me what she had made and I was very very impressed. I couldn't believe my eyes my 9 year old daughter had just made this Mathematical shape. Her old brother is a School teacher in Bergen and he asked how Ingrid made it. So here is the video. of course she is talking Norwegian but the video shows very clearly how to make the Wheel.


Items you need:-

 
Scissors
8 sheets of A6 paper in different colours


Tips

When you open your pattern you should do so from the centre and NOT from the edge.. As you open use both hands at the same time.
 
Here are the different stages as you open or close your wheel


N.B. Ingrid found a tutorial on U-tube on how to make this wheel


Thursday 23 April 2015


Table name card. A babies cot


You will need:-

Glue and a glue gun if you have one

Card stock plain and patterned

Scor-Pal

Ribbon

Circle dies ( unless you can cut your own free hand )

Patterned dies for the edge of the cot

Decoration of Your Choice


Now let's get started

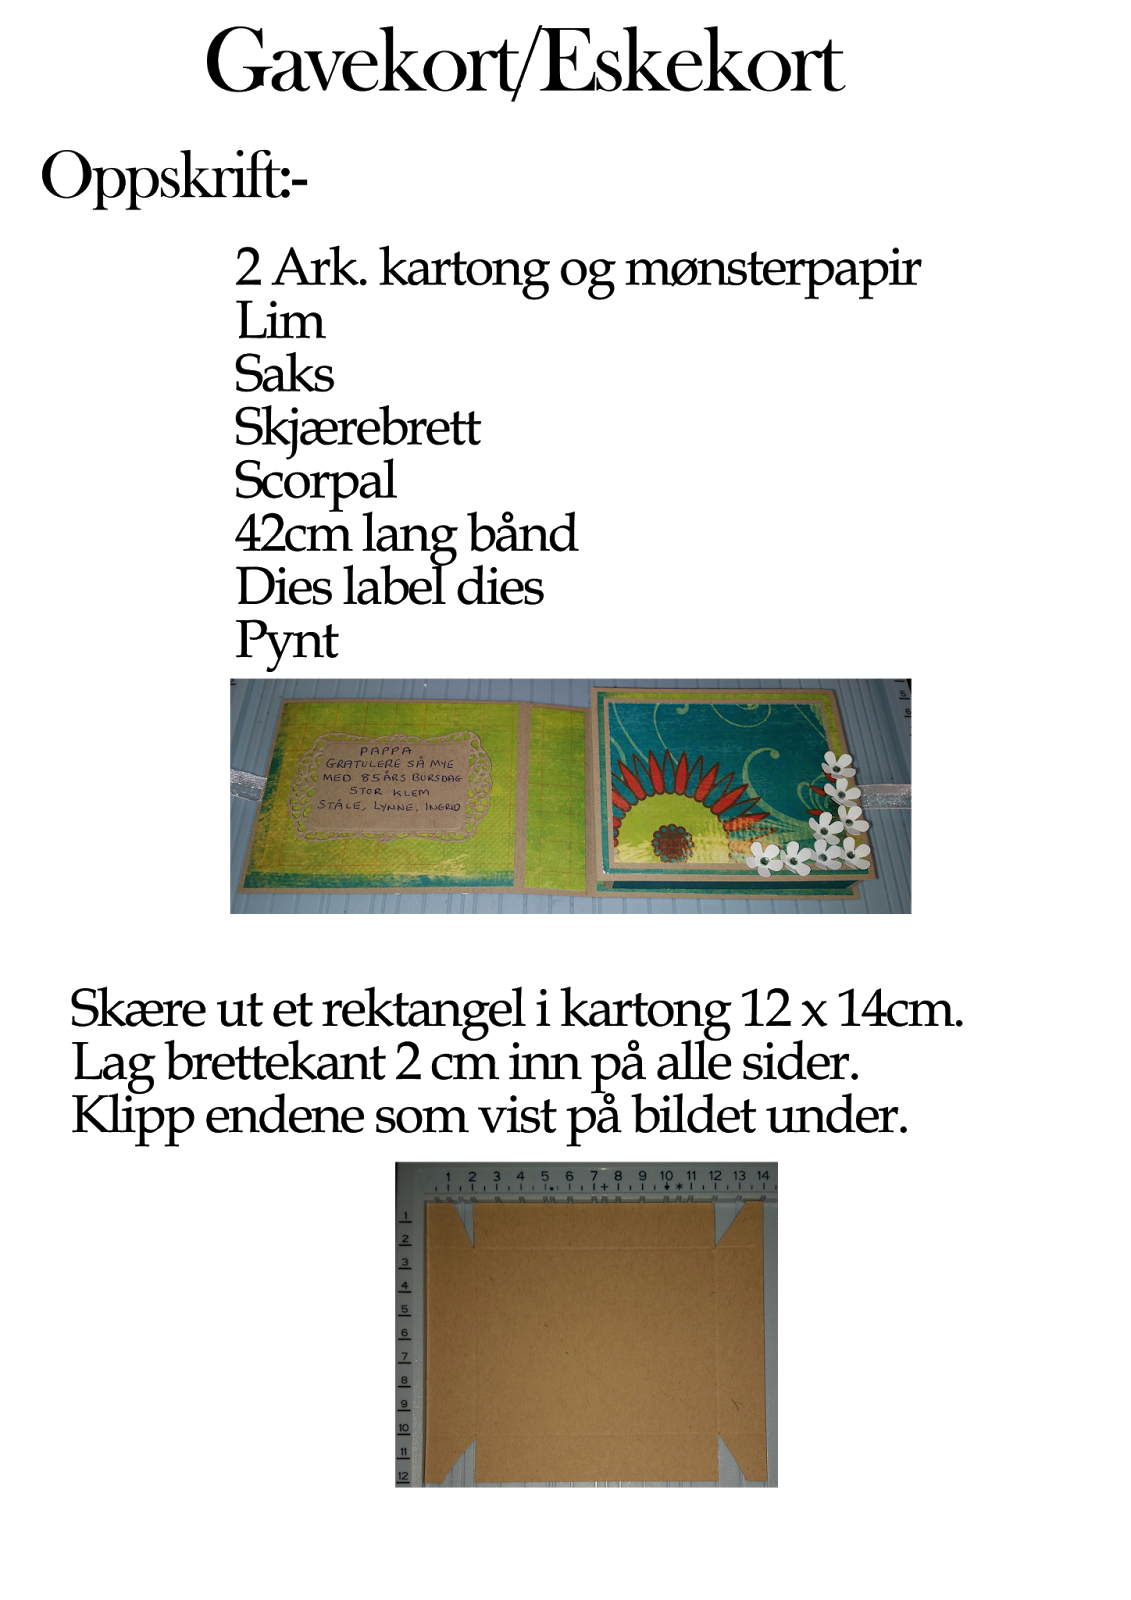
You need to cut a piece of plain card stock  4.1/4 x 6.1/4
 inches
  and score 7/8 of an inch on each edge
 
One inch has 8 . 8ths. Count 7 from the first mark and you will have Your 7/8 of an inch. It's the bar before the one inch mark as shown in the photo above.


 Clip  each corner to make your box. Glue together making sure that this time your flaps are on the outside of the box as in the photograph below.
 
 
Here you can now see that the inside of your box has no joints because the flaps are on the outside


Now cut your plain card stock 5 x 4.1/4 inches and score in at 1.1/4 inches as shown in the photo below.


Now bend you edges as shown in the photograph below. This now makes the frame for your cot.


Take a die and cut two strips of plain card stock measuring 4.1/4 inches long. The height is up to you, mine was cut at 1 inch high as shown in the photo below.


Now glue your cot sides to your frame making sure you glue them on the inside of the frame and low enough down so when you glue the cot bade inside this frame you will not see the bottom edge of the frame.as shown in the photographs below.


Now take you cot base and frame and glue them together as shown in the photographs below.
Please note you have to glue the cot sides to the base.


Now it's time to make the headboard and the baseboard. To do this first you will need 4 circles for each headboard.  Cut two circles from plain card stock. Mine measured 4 x 4 inches and 2.7/8 inches x 2.2/ inches. As shown in the photograph below.


Cut two  slightly smaller circles in patterned card Stock and cut two circles just a little bit larger than the circles you have already cut ( mine are in white ). Now you should glue all Your circles together as shown in the photographs below. The single white circle is in the middle, then the plain blue card Stock is stuck to that on both sides and then the patterned card stock is on glued on one side


The above headboards show the outside this is up to you on how you decorate them. On the smaller of the two circles I printed the guests name and on the outside of the larger one I glued a decoration. You can decorate the outside circles now or wait to the end it's up to you.
 
I Attached the circles by using the magnetic plate to the big shot to give me the correct height, but you can use a book. Making sure that you circle is straight and flush against the cot glue the circle to your cot


Now to make Your quilt. cut a plain piece of card stock  5 x 3.1/2 inches and round the corners.
 
TIPS:- fold the card in half and round all the corners at the same time that when it looks much nicer when you open your book.
 
Cut 4 pieces of patterned card a little smaller and glue them to each panel. Then it's time to decorate your little book as shown in the photographs below.


Inside the cot I have printed out some Words and used foam pads to stick them down


Now to make your pillow cut 2 pieces of patterned card stock 2 inches x 1. 1/2 inches and round all the corners. Then glue your ribbon inside one piece and using foam pads stick the two pieces of card together.
 
In order for the pillow to stand right against the headboard you need to cut a small piece of card and fold it into an 3 sided shape and stick one end to the back of the pillow  and underneath add a foam pad and then glue it to the headboard as shown in the photographs below.


So the quilt sits up high enough you will need to make a triangle from  card stock.  Glue it to the back of your quilt book. The higher up you glue your triangle the higher of an angel your quilt will sit.


Now you can finish decorating your cot


TIPS

If you use a glue gun it will save you lots of time in decorating your cot. If you have never used a glue gun before be very careful that you don't burn yourself as the glue can become very hot. you have to work very quickly as the glue cools down very fast and then it will just go hard and will not stick.
 
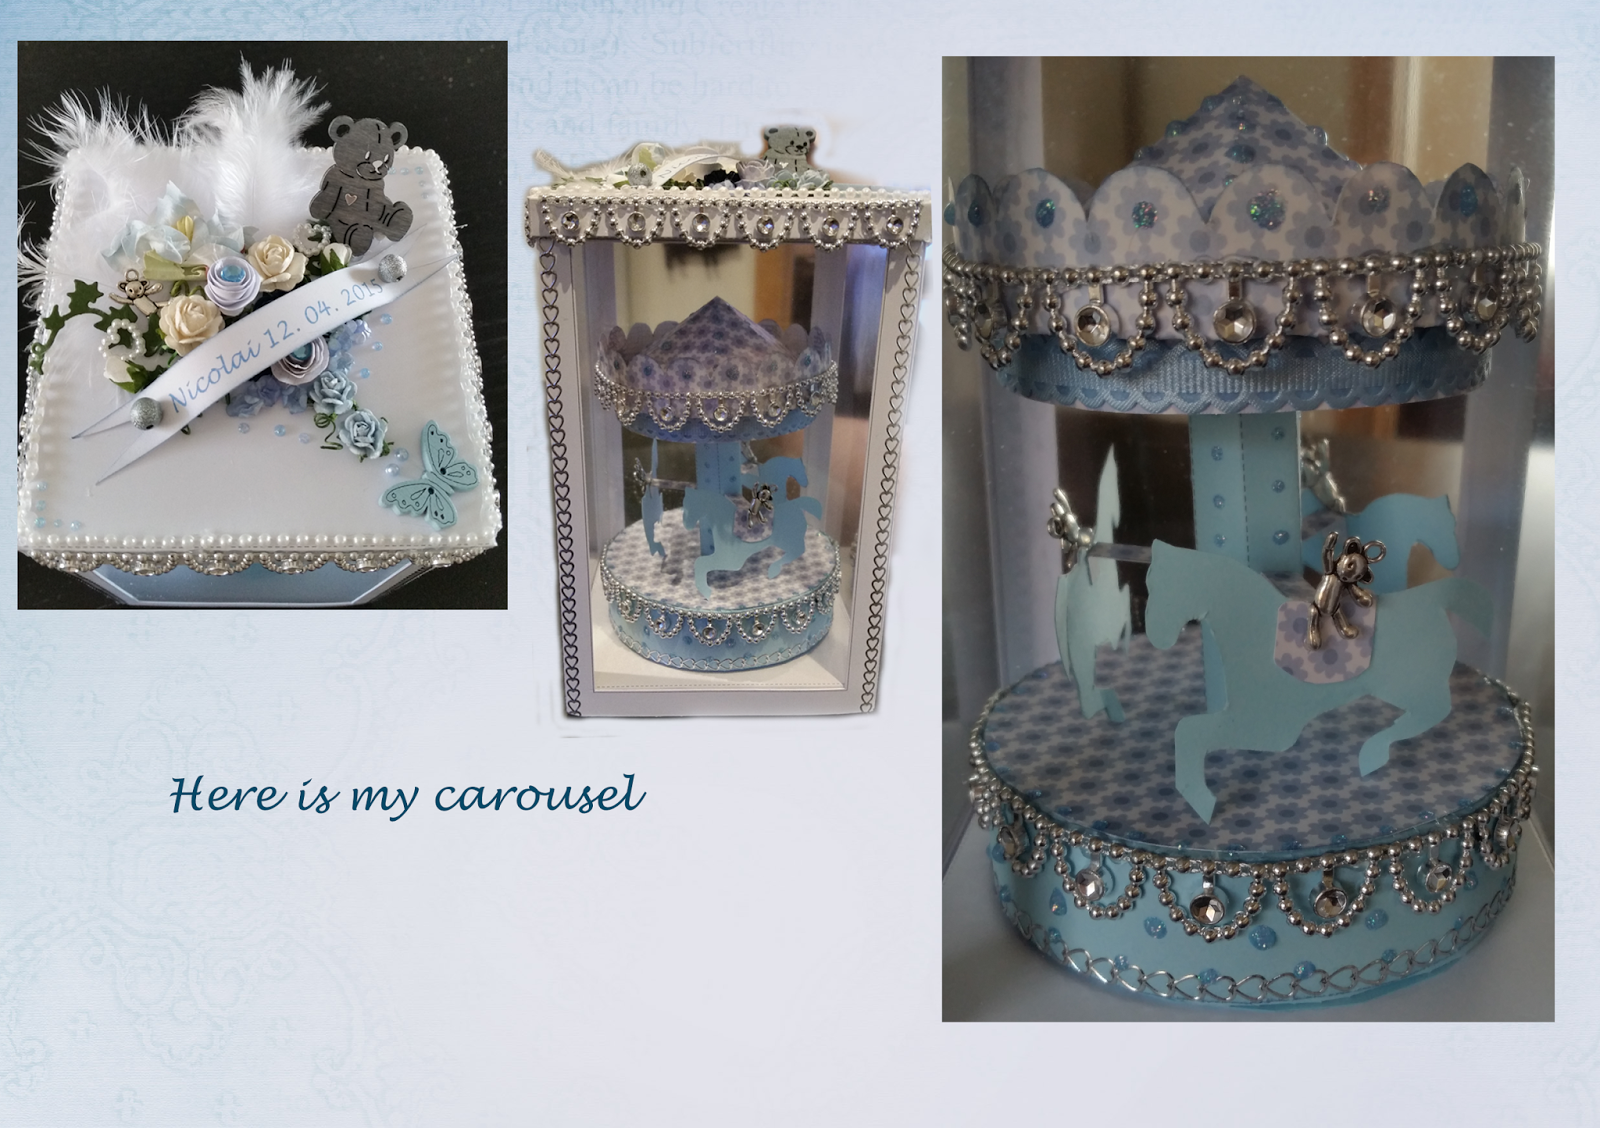
Here is a gift for the baby


you can buy the tutorial from
 
 http://www.cardcarousel.co.uk/store/index.php?main_page=products_all&disp_order=1&page=9


Friday 17 April 2015


Another Box card


As I said in a previous post you can make this box for many things. Here is another idea I made this for our grandsons first birthday.


 The little flag was made by cutting some paper and gluing it to a lolly pop stick


I like to pack my gift in cellophane.


Thursday 16 April 2015


GIFT CARD BOX

This makes a nice gift box to put a gift card inside.


You will need
 
2 card stock and patterned paper of your choice.
Glue.
Scissors.
cutting Board.
Scorpal.
42cm long ribbon
Label dies ( cut Your own if you don't have dies )
Decoration of your Choice.


First cut your card stock 12 x 14 cm
Using your scorpal score at 2cm for each side then clip out a small piece as shown in the photograph shown below


Fold the edges of your score lines and glue together as shown in the photograph below.


In the same card stock cut out  one piece of 12 x 7, 75 cm
Score at 2cm on just one side as shown in the photograph below.
 
 
Now put this last piece into your box and glue the fold into the edge of the Box. This will make a flap as shown in the photograph below. Don't worry that your lid doesn't cover the edges of the box this will be sorted in the next stage
 
 
Now cut out a piece of card stock measuring 8,5 x 10,5 and glue this to the flap of the box so you end up with a larger lid so when closed it will cover the box as shown in the photograph below.


Now cut a piece of patterned paper  measuring 8 x 10 cm and glue this to the top of your lid as shown in the photograph below


 from the patterned paper cut 2 strips  measuring 1,5 x 7,5 cm
and 2 strips measuring 1,5 x 9,5 cm.
Glue these strips to the sides of your box.. 


Out of your card stock cut a piece measuring 25 x 9cm.
Now score the card at 11 cm from the left hand side and 11 cm from the right hand side. This will give you a little panel in the centre. Now cut your ribbon in half and glue each piece to the side of your card stock as shown in the photograph below.


In the patterned paper cut out 4 pieces measuring 8,5 x 10,5 cm and
2 pieces measuring 8,5 x 2,5 cm. Now glue this to your card as shown in the photograph below.


                                Now you can glue your box to your card as shown in the photograph below.

 
Now your box is ready to decorate.
This box is much more fun to give as a present than just putting a gift card in an envelope.


TIPS
 
If you want to layer your panels with other card stock I suggest you cut your paper 0,5cm Shorter on all sides so that you leave a small edge around all the sides..